Watermelon Margaritas: Take 3

And Watermelon Margarita Week continues!! Today’s came from a Pin that I cannot for the life of me find again. I swore I pinned it, the others are still there, this one is not.

Before you get all cray cray, I know that a margarita is tequila, and that this recipe calls for vodka. But, I wanted to try a variety of recipes, so this one made the cut!

Vodka Watermelon Margaritas

5 cups cubed watermelon

1 cup lemon/citrus vodka

1/3 cup lime juice

1 can of lemon lime sparkling water

Ice

image

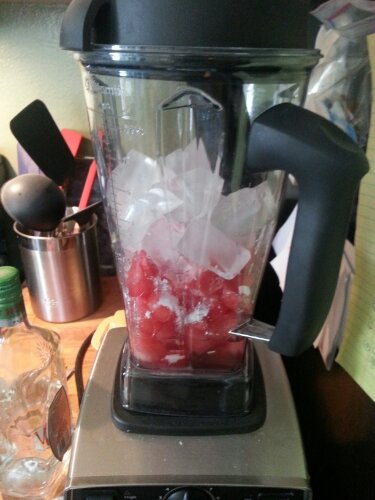
This blended up pretty good. The texture was a lot like Monday’s recipe.

image

Here they are served up and lookin’ all frosty and inviting!

image

The Verdict

Allow me to cut right to the chase. This was my least favorite so far. Hubs took a sip and said “hmm, give me a minute”. He eventually decided that he liked them because they were subtle and refreshing. I thought they lacked flavor. There was not enough lime and the sparkling water added a dryness.  After the intense sulshiness and sweetness of Tuesdays recipe, this one just left me wanting something else.

Happy Pinning!

Cheers!!!

Watermelon Margaritas – Take 2

Yesterday we started off Watermelon Margarita Week here on Pin There Done That! One recipe a day for four days in search of the perfect frothy summer drink!

Today’s recipe was modified from this pin:

Watermelon Margaritas

Frozen Watermelon Margaritas

4 cups frozen watermelon balls/cubes

3/4 cup Tequila

1/3 cup Lime Juice

Throw it all in a blender. Doesn’t get easier than that!

You just have to remember ahead of time to freeze your watermelon. However, if you’re cutting up a big one and have extra, you could just freeze it to have on hand for future use!


Here’s all my ingredients:

image


Throw it all in the Vita Mix

image


I was very excited with how this was blending up. So thick and yummy looking.

image


With the watermelon being frozen and not adding ice, you’re taking away a lot of the liquid component from what we had yesterday. This was like a restaurant style frozen margarita – but without fake flavors or added sugar!

image


Poured, or rather spooned, into the glasses!

image


We drank these with spoons, and it did require frequent swirling and stirring.

image


The Verdict

“That’s pretty good” were the first words out of the hub’s mouth. These had more watermelon, but the same amount of tequila as yesterdays, but they tasted much stronger. I was in love with the texture. love love love. No little ice chunks to chew, just smooth yummy margarita.

Also, if you were doing other summer drinks, you can use frozen watermelon for ice cubes instead!

Watermelon Margarita | www.girlichef.com

Happy Pinning!

Cheers!!!

Watermelon Margaritas: Take 1

We bought a watermelon from Costco. Baby has been loving eating the summer fruits and I was craving some as well. But, the watermelon was huge, and there was tons and tons. I used my melon baller to ball it all up and then thought of what I could do with it all.

And then I found this:

Wedding Signature Drink Frozen Watermelon Margarita Recipe #wedding #cocktail #watermelon #margarita

Actually, I found that and three others like it. And then I knew what I had to do. A watermelon margarita showdown. Four different days, four different ways, on a search to find the best of the best.  (And a lovely excuse for the delightful summery icey goodness)

Watermelon Margaritas

(adapted from the above recipe with a few modifications)

3 cups balled/cubed watermelon

3/4 cup Tequila

1/4 cup Lime Juice

1.5 Tbs Powdered Sugar

3 cups ice


Then throw it all in the blender. (Have I mentioned how much I love my VitaMix? If you don’t have one, you need one.)


image


After a couple minutes of blending, we had this delightful pink concoction

image


It was a little bit foamy. I believe this was from the powdered sugar, like they have in an Orange Julious

image


And here it is poured in to two lovely glasses.


image


The drinks started to separate pretty quickly leaving a foamy frothy top and liquid below, the two did not mix when sipping. After a few sips like this, I grabbed a spoon and gave it a swirl every now and then.

image

The Verdict

Hubs and I both really enjoyed this recipe. He said “It’s a good standard margarita” , a good jumping off point. This will be our base line to compare the next few recipes to come.

I thought they had a really good flavor, the ratio of tequila to melon was good. I didn’t like that there were still some tiny ice chunks, this could possibly be resolved with a bit more blending, but I was hoping for something smoother slushier and less liquid.


Stay tuned for tomorrow’s recipe!


Happy Pinning!

Cheers!

Five Friday Favorites

Look at me being a diligent little blogger and posting all week!! Hooray! We made it to Friday and time for some favorites!!

{1. Most Amazing Tree House Ever} Holy Moly. This makes me want to buy a house based on it having a tree in the yard so my son can have a tree house like this one.

Darling....treehouse, step by step

{2. Chocolate Cake with Basil Frosting} A Few years ago this would have made me fake gag and run the other way. Now I can’t wait to try this flavor combination!

Chocolate Cake with Basil Buttercream

{3. Lemon Meringue Pie S’mores} say WHAT?! This looks to die for

lemon meringue pie s'mores and other s'mores ideas

{4. How to download all those free fonts!} This blog offers several links to free fonts….and a tutorial on how to get them in your programs to use them!

We Lived Happily Ever After: How to Download all of those Fun Free Fonts!

{5. Backyard Bowling} Ok, now my future back yard needs a good tree, and some open flat space for this!

Build this outdoor bowling alley for your back yard to make sure you enjoy that space as much as possible. We like the idea of leaving some area in the garden clear for this!

Happy Pinning!

Happy Friday!!!

More Buttercream with a Spoon!

One buttercream post is never enough! Yesterday we looked at this method of buttercream frosting:

image

In the above cake, I used the method with a Wilton #12 tip and completely covered the sides and top of the cake.

I had the privilege of creating a red white and blue first birthday cake for a friend’s daughter. I had originally planned on using the open star tip (Wilton #32) to do a simple swirly boarder. But, it wasn’t cooperating with me.

Then I remembered this pin!

Tutorial: Easy Frosting Technique

This is the same pulling technique as we used yesterday with the round tip, but using the open star!

image

This time instead of doing the full sides of the cake, I simply made a top boarder and a bottom boarder.

image

I was really happy with the texture of this look and a little excited my first plan didn’t work out, so I could do this plan B!

image

Happy Pinning!

Happy Cake Decorating!!

Butter Cream Frosting with a Spoon

If you haven’t caught on yet, I love baking and decorating cakes. Love it. Pinterest is a fabulous place to find tips and tricks, tutorials, inspiration, and recipes!

I’ve been seeing this technique all over Pinterest and had just been waiting for the opportunity to try it out myself!

Tutorial: Buttercream Piping Technique Plus A Gumpaste Rose | Sweet Indulgences Cakes

What you need:

1. A crumb coated cake

2. A large batch of buttercream frosting

3. A piping bag and coupler (One per color you plan on using)

4. A Round frosting tip  (I used Wilton #12)

5. Small flat or offset spatula, or spoon

6. optional Food coloring/gel

7. Patience 🙂

Method:

Start by dividing your frosting into equal portions for however many colors you plan on having. I chose to use 4 shades of blue and white to create an obmre effect.

Tint your frosting and fill piping bags fit with couplers.

image


I kinda got in the zone after this, so there aren’t any in progress pictures.

I only had one #12 tip, so I started at the bottom row with the darkest color and went all the way around. Then switched my tip to the next lightest frosting and went around again.

Pipe a ball on the side of the cake. Then take your spoon or spatula and lightly press it in the center of the circle while pulling it to the right. Pipe another ball in the drag of the first. Repeat all the way around the cake.

When you move up to the second row, be sure and align your ball with the one below. This can be tricky depending on how much drag you have. If you have more than one circle tip or are only using one color, you can pipe a row down the side of the cake and pull them all at once to ensure uniformity.

image


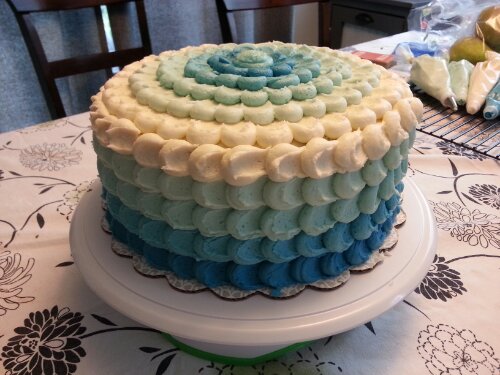
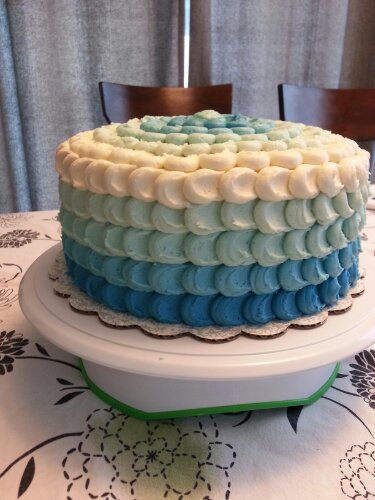
To create the top of the cake, I reversed the ombre colors. This time I went around the very outside first, and dragged the center of the balls in towards the center of the cake. When I got to the very center, I switched back to the middle lightest blue and did not pipe out the tip. This made a swirly of the darkest and middle color blue for my center dot.

image

image

image


The Verdict:

I create this cake for my husband’s aunt’s 50th birthday party. The inside of the cake was also ombre blues! The cake was a hit and everyone was so impressed. It’s a simple effect with a big bang result!


Happy Pinning!

Happy Cake Decorating!!

Bone cake

A friend of mine approached me about making a cake for a dog’s birthday party. The dog was described to me as a “diva”, but the cake was for her human guests. She brought up wanting a bone shape or anything else cute.

Immediately I headed to Pinterest (you all use Pinterest instead of Google now too, right?) for inspiration. There were several cute ideas out there


Dog bone cake

Thankfully I stumbled upon this layout to help me get the shape right!

Bekah wants a dog bone cake

I have four inch pans that are used for filled cakes. They were the perfect size for the ends of my bone. I ended up baking an 8×8 pan as well to cut the middle shapes out of. This shot is of just the first layer of the cake. I filled the holes with a layer of butter cream and crushed pineapple. Then Frosted the overall cake with a pineapple butter cream.

image


After the cake was frosted, I created a collar out of fondant and a little pile of flowers in coordinating colors. The party was a luau, so I wanted to tie that in as well!

image


Happy Birthday Piper!

image


Happy Pinning!

Happy Cake Decorating!!!

Oreo Cool Whip Bomb Cake

I found this pin while looking for desserts to take camping. Oreos, cool whip, what’s not to love?

Oreo Bomb Cake (This looks amazing!)

As you can see from the extra long photo montage (so happy they truncate those on Pinterest now!) it’s super easy.

Ingredients

Oreos (# of packages depends on how large of a dish you’re making)

Cool Whip (1 tub per pack of oreos)

1 glass of milk

optional chocolate or caramel sauce

Method

1. Dunk your oreos in milk and line the bottom of a dish with them (You can use anything, casserole dish, pie pan, bread loaf pan, whatever)

2. Spread a layer of cool whip over the oreos.

3. Dunk oreos in milk and make a second layer.

4. Cover with cool whip

5. Keep repeating til you get your dish full

6. Sprinkle with crushed cookies and drizzle with chocolate or caramel as desired.

7. Refrigerate 4 hours to overnight

image

Here’s how mine turned out! Since this was a test, I only wanted to devote one package of Oreos. I didn’t fill my pan, so my whipped topping spread out a bit. My mouth was watering, but I stuck it in the fridge anyway to wait.

After dinner, I was ready to dig in. I scooped some out on my plate and got this.

image


Not the most appetizing looking dessert, but still. I bit in and….it was Oreos and cool whip.

Not sure what I was expecting. Some amazing transformation into a delicious cake? The Oreos were slightly mushy and the coolwhip hadn’t really reformed.

I let the plate sit and thought about the wasted Oreos. About 15 minutes later I took another bite and it was completely different. The cookies had absorbed more of the cool whip and taken on more of a cake like texture.

Verdict

All in all, it was good.  However, after a few bites I realized that I had just consumed 4 Oreos and a dollop of cool whip and decided I’d better put it away. My husband was not a fan at all. In the future I’d much rather just have either some Oreos or some cake.


Happy Pinning!

Happy Baking!!


Baby Stuff I Never Needed

To continue on our theme from yesterday about babies, I thought I’d throw together a list of the things I didn’t need. There is so much stuff you can get for your new life with a baby, it’s completely overwhelming. Here’s the things I skipped, and my baby is still alive.


1. Wipes Warmer

This was totally silly to me. Even if the wipe is wet, as soon as you’re away from their skin, the damp skin is going to get cold. I’ve also only really seen him react to a “cold” wipe maybe three times out of a zillion diaper changes. Save your money for something essential!

2. Bottle Warmer

I didn’t mean to not get this, I just never got around to it. Every bottle that my baby has had at home (he’s all breast milk, but occasional bottle of breast milk) has been right out of the fridge. And he’s never had an issue drinking it. However, he is in full time day care, they have a bottle warmer so he’s use to that there. Worst case, you can just set your bottle in a cup of hot water to warm it up if needed.

3. Changing Table

I’m talking the specific changing tables that are only for that purpose. We have a dresser with a wide top that we attached a changing pad to instead. The dresser is functional with drawers to hold his cloth diapers, wipes, jammies, and clothes. When he’s done in diapers, we take off the pad, and presto, he has a normal dresser again. No need to buy more big pieces of furniture than necessary!

4. Baby Books

All the information you could ever want is at your fingertips on the computer! Each book is written of that author’s research and opinion. For me, that wasn’t enough. I wanted to know a variety of opinions and research to decide the way I wanted to parent. Baby Center has an amazing amount of information on any topic from day one of pregnancy, through kids 10 years old. Lucie’s List was a great resource for me, providing weekly emails based on your phase of pregnancy/baby age. And I love Wholesome Babyfood for tips on what my baby can eat and what age and recipes for baby food! All the sites are free. There are millions more. All the hard copy books I got just sat there collection dust.


Happy Pinning!